
Install firmware via webserver
Ensure that your network is correctly configured
The built-in webserver listens by default on the address 192.168.10.1.
Connect the black ethernet RJ-45 to your network.
Open a terminal/console application and enter ping -c1 192.168.1.1. If you get an answer like
PING 192.168.1.1 (192.168.1.1) 56(84) bytes of data.`
64 bytes from 192.168.1.1: icmp_seq=1 ttl=64 time=0.066 ms
1 packets transmitted, 1 received, 0% packet loss, time 0ms
rtt min/avg/max/mdev = 0.066/0.066/0.066/0.000 ms
everyhing is okay and you open the address http://192.168.10.1 in your browser and continue with flash the firmware. Else you must
Configure your ethernt to listen on 192.168.10.2
This is done by adding a secondary interface to your primary network interface. Assuming you interface is called eth0 just call the following commands
sudo ifconfig | grep 192.168.10.
http://192.168.10.1
sudo ifconfig eth0:1 192.168.10.2 up
ping -c1  192.168.10.1
Flashing the image via the browser
Set the root password

Allow SSH acces (if desired)
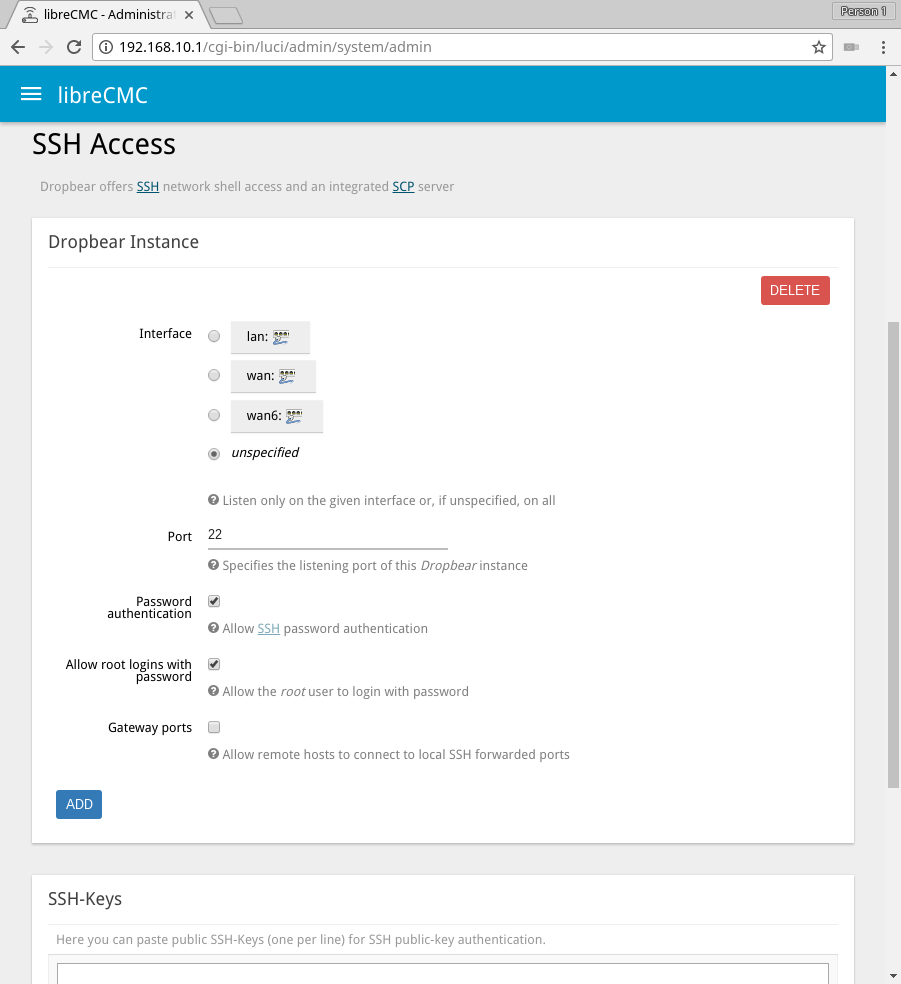
Save the root password and SSH configuration by pressing SAVE

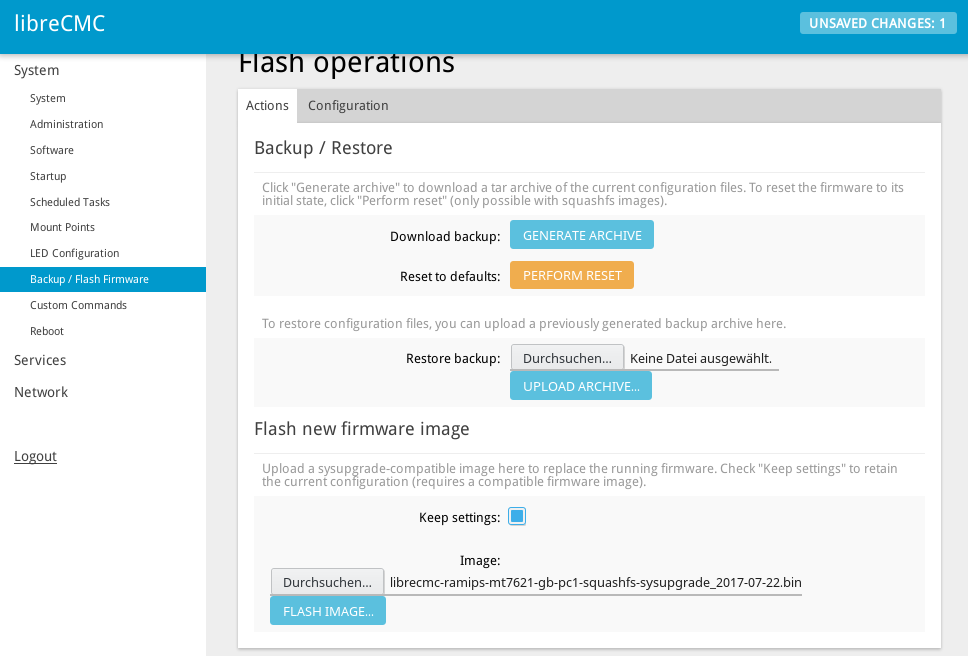
Select on the left menu Backup / Flash Firmware

Select the downloaded firmware image from your PC
Check the MD5SUM with the one given on github. If it matches press PROCEED
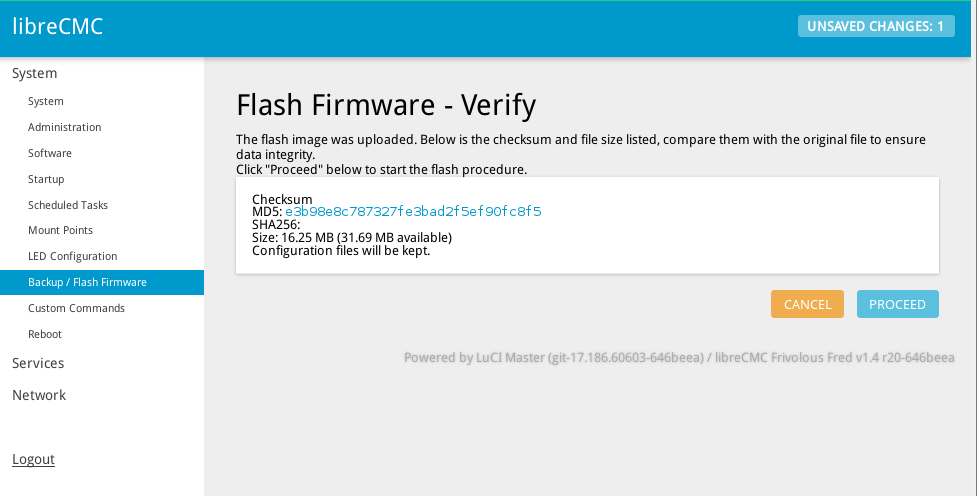
Flashing will take several minutes

If you have a USB-2-UART cable you can check the boot process by listening on the serial console as explained under USB_to_UART